It often happens that we find ourselves in front of a breathtaking panorama and we do not have adequate experience or enough knowledge on how to capture it best. In this article, I recommend nine “moves” that you can apply immediately, even if you are just starting out in this profession (or passion). Your shots will improve considerably.
1. Use a tripod
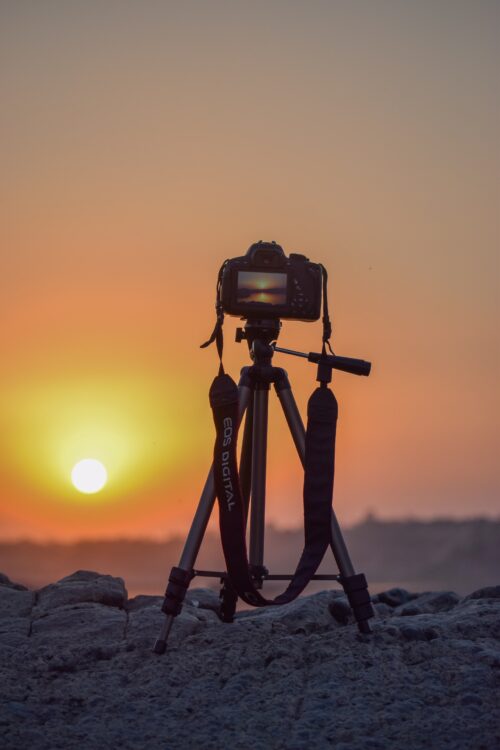
It may seem obvious to many, but I still see people walking around, especially at night, taking pictures while holding the camera in their hand. Whether amateur or not, knowing how your camera works is essential, even for the simple fact that if you have invested money in buying a camera, you are surely interested in taking quality photographs. In landscape photography, the tripod is the first thing you should have, it is fundamental both day and night. The main reason is that in landscape photography, stability is very important to avoid any kind of noise. In fact, when we close the aperture, the amount of light that enters the camera is low, so to achieve a correct exposure in our composition, we need to lengthen the shutter speed. If we lengthen the shutter speed and do not use a tripod, even the simple movement we make when we breathe will result in a blurry final shot.
Digital cameras, today, are very sensitive to movements. If you take pictures at times when there is little or no light (during sunset, sunrise, or at night), it is advisable to also get a remote shutter release button because even the simple touch and pressure applied to the shutter button on the camera will cause movement and therefore noise. If you do not have a remote shutter release button, you can also set the self-timer on your camera.
2. Give importance to depth of field
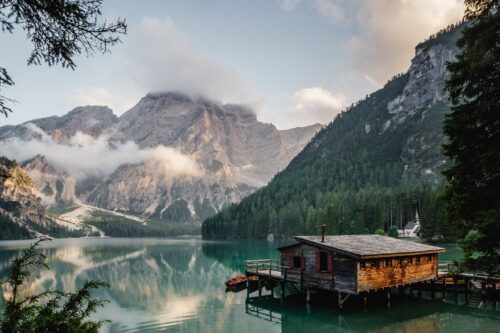
When framing a landscape with your camera, always try to focus on as many elements as possible. Maximizing the depth of field helps to avoid parts of the landscape being subsequently blurred. The most immediate and simple method to do this is to close the aperture of our lens as much as possible (usually around f/11 – f/16) because the smaller the aperture, the wider the depth of field and consequently, more elements will be in focus in your scene. Always remember that having closed the aperture, less light will enter the camera, so you will need to adjust the other parameters for a correct exposure, i.e., the ISO and shutter speed.
 3. Look for a focal point
- In any genre of photography, it’s always important to focus on a focal point, a detail, a subject, or anything that prevents the photo from being too static. In my opinion, in landscape photography, this advice depends on many factors, such as the final goal of our photo, the composition, and the emotion we want our shot to highlight and convey. One thing is certain, if the environment of our scene is very neutral, a focal point helps to give more dynamism to the composition, but also to guide the eye of those who will observe your photo.
When you are struggling and there is no possibility of finding a focal point, use yourself within the composition, but be careful not to only concentrate on finding or including a focal point, but also on where to position it within the scene. The rule of thirds will certainly help you!
4. Use lines

This advice follows the same goal as the previous point: to guide the observer’s eye through a focal point. A question you should always ask yourself when taking a landscape photo is “How do I guide the observer’s eye in this photo?” Therefore, if there is no focal point, we can follow the lines, if present, that guide and immerse the viewer in our composition, giving the photo depth.
5. Follow the weather
Many inexperienced or beginner photographers see a sunny day and decide to go out and take photos because “it’s a beautiful day.” Nothing could be more wrong! Landscape photography has nothing to do with beautiful days; the best photos are always those where the weather is adverse.
In fact, many professional photographers look at the weather before going to visit a place and take landscape photos. Strong winds, threatening clouds, storms, and the sun immediately after intense rain are the most beautiful moments to photograph because nature is unpredictable and gives unique and unforgettable scenery. If you are able to frame this spectacle, then you are on the right track. If you notice, the most famous landscape photographers of today are those who live near or in contact with nature or where the weather changes often and continuously.
Therefore, in addition to looking for such situations, if they occur constantly, try taking them at different times; natural light changes every single moment, and in landscape photography, a photo is hardly the same as the previous or the next one.
 6. Shoot during the Golden Hour
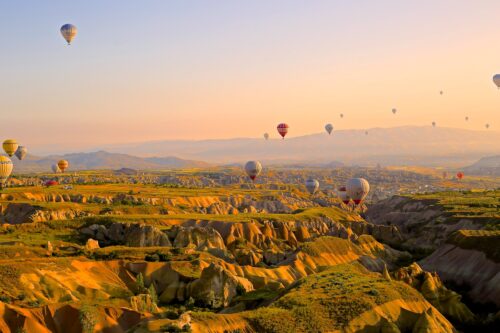
- The Golden Hours are the times when the light is soft, the colors are warm, the shadows are so long that they tend to disappear, and there is a good level of contrast. To simplify things a bit, we can say that in most situations, the golden hour corresponds to the light during sunrise and sunset.
Try taking landscape photos during this phase of natural light; you will appreciate the magic and make your photos incredibly deserving.
7. Weighing sky and earth
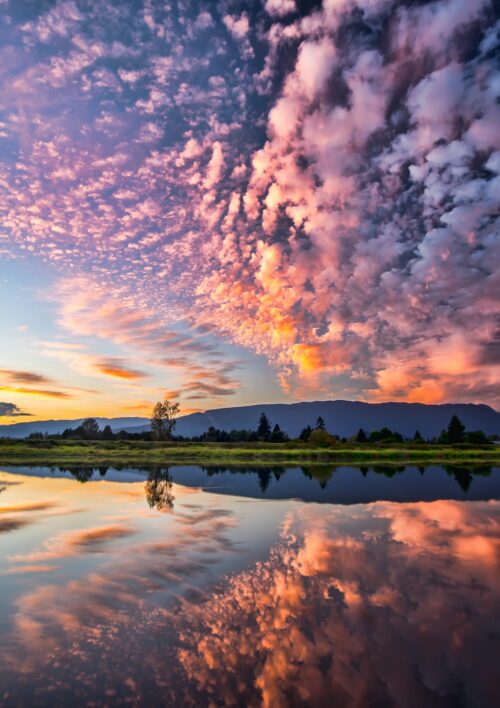
With this title, I’m not telling you to balance the portion of sky or earth within your composition, but rather the opposite. Observe the scene and see which element deserves more space in the photo. For example, if the sky is cloudless, shades are absent, and it is boring, place it in the top line following the rule of thirds, so the composition will have the remaining one-third. However, if you are in the presence of a sunset, or a game of dominating clouds, highlight it in your composition, giving less importance to the earth. Following the rule of thirds, the separation line between sky and earth will be at the bottom, so the sky will occupy the first two-thirds of your scene, starting from the top, of course.
8. Capture movement
One way to completely immerse the viewer in the composition of the photo, as if they were there with you when you took it, is to capture movement. How? Nothing could be simpler. During low-light scenes, simply increase the shutter speed, but if you are shooting a landscape in broad daylight, you will need an ND (Neutral Density) filter. This type of filter, usually graduated, will limit the light that your camera’s sensor can store during the shooting phase. In other words, they work exactly like sunglasses. Imagine that our eye is a lens. When we put on sunglasses, the light we capture is lower.
One way to completely immerse the viewer in the composition of the photo, as if they were there with you when you took it, is to capture movement. How? Nothing could be simpler. During low-light scenes, simply increase the shutter speed, but if you are shooting a landscape in broad daylight, you will need an ND (Neutral Density) filter. This type of filter, usually graduated, will limit the light that your camera’s sensor can store during the shooting phase. In other words, they work exactly like sunglasses. Imagine that our eye is a lens. When we put on sunglasses, the light we capture is lower.
As a result, to have a correct exposure, you will need to lengthen the shutter speed. Now we can capture the “moving” elements of our scene. These could be leaves moved by the wind, waves on a beach, water falling from a waterfall, etc. By lengthening the shutter speed, all these elements will appear to move, creating a sense of movement within the composition.
9. Change your perspective
Have you seen a place in a photo and absolutely want to go and capture that scene yourself? How many people have thought the same thing? How many people have done it before you?
My final piece of advice is to try to do something of your own, to go to that place, study it and explore it, and if you’re not convinced, go there at different times to see if the light is what you’re looking for, the right one. Without risking anything, try to find different perspectives. If you’re taking your first steps in photography, consider it an exercise to develop your sense of adventure, photographic composition, and creativity!
Conclusion
Now, take your camera, go outside, and try to apply these tips to your next landscape photo. You’ll see the improvement in your shots for yourself. Also, if you want, send me your results on my social media channels, and I’ll try to give you my opinion!