Very often, as you already know, I advise you to shoot in particularly not “peaceful” weather conditions. The rain creates photographic situations that are as difficult as they are unique. A scene enclosed in such a weather condition can emphasize the subject or the panorama within our photoshoot. The next time it rains, while everyone else stays indoors, cover your photo backpack well and get out. You might find something that even you didn’t imagine you could photograph.
These days at the photographic level are challenging and for this reason, I decided to write some tips that you can follow to be able to capture spectacular photos with and during rainy days.
1. Preparation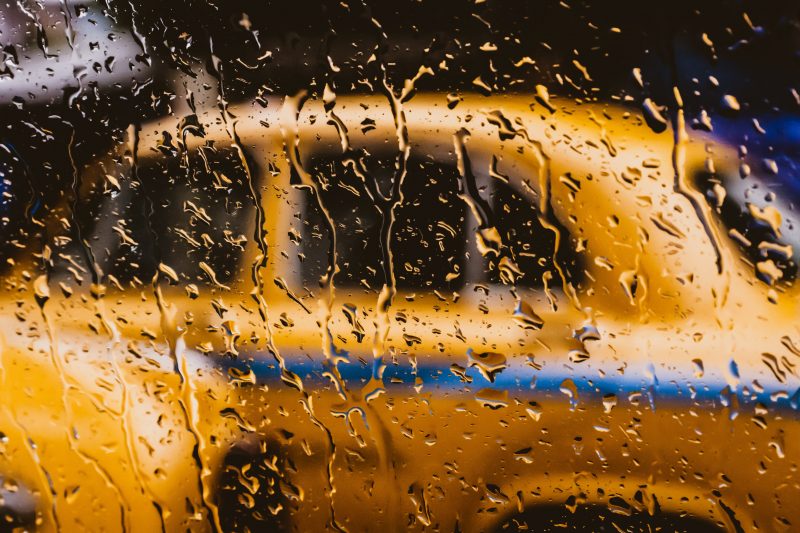
The first thing not to be underestimated is that you absolutely have to make sure that the camera is well protected and sealed from rain if it is not waterproof. In addition to covering yourself, also bring a rain cover for your camera or a plastic bag with elastic bands to protect the camera. Once your camera is covered, it will be difficult to change lenses, so avoid changing the lens as much as possible to keep that moisture out and consider using a UV filter for greater lens protection. Also remember to keep a microfiber cloth on hand and regularly check for the presence of errant falls on the lens, because surely there will be. Finally, watch out for any condensation that may form when you move from colder to warmer areas (and vice versa). A possible solution to the latter problem may be gel packs that absorb moisture. To cover the camera also study the environment or use common objects: porches, trees, garages, protruding cornices, and even umbrellas can offer shelter from the rain, take advantage of them!
2. Weather Conditions
A little planning can do well. Consider exploring in good weather the areas you’d like to photograph during the rain. Study the light when it rains, in fact, the rain is unpredictable and the play of light is assured. If a place hits you, but maybe the light does not convince you, wait a while and look for the moment you are imagining. Obviously, rain can also be one of the weather conditions that cause unimaginable disasters, therefore, before venturing out, think about whether it is worth it and if it is possible that you risk something.
3. Manual Focus
Rain can create problems with the autofocus, therefore, it changes directly to manual to overcome the problem. This way, you can decide if you want to focus on individual raindrops, a figure on the street, a building in the distance, or something else. For freedom and better precision, as these are often poorly lit scenes, take the famous tripod with you.
 4. Shutter Speed
Another detail that you need to give (and do) attention to is the shutter speed. The faster it will be, the more it will allow you to “freeze” the movement of raindrops; too slow and they will disappear. To compensate for the faster shutter speed in lower lighting conditions you need to keep the exposure triangle in mind. To have a correct exposure you will either must open the aperture or increase the ISO, but always remember that the higher the ISO the more noise you will get in your photos.
Of course, increasing the shutter speed is not the only way to shoot in the rain. Waterfalls and seascapes often give their best on rainy days, and to catch them at their best you will have to make long exposures, that is, slow shutter speeds.
5. The Magic Touch
Now let’s start having fun in earnest! The best photos during the rain are when it was backlit; then, find a light source and shoot in front of it. However, avoid shooting directly into the light source, otherwise, the first problem you will encounter will be overexposure. The experiment than to find the right angle. Some light sources can be streetlamps, a flash, car headlights, or even sunlight.
The backlight is also perfect for silhouettes, but you can also use artificial light to bring out your subject. Finally, if you want raindrops to be visible in your photograph, shoot on a darker background or you can even play with a flash to give those raindrops a golden glow. The trick, in this case, is to keep rather low power, because it recurs, as already mentioned, to the problem of overexposure.
6. Be Creative
After some advice on the various settings to set, let’s see now what the best subjects are to start your new relationship with the rain.
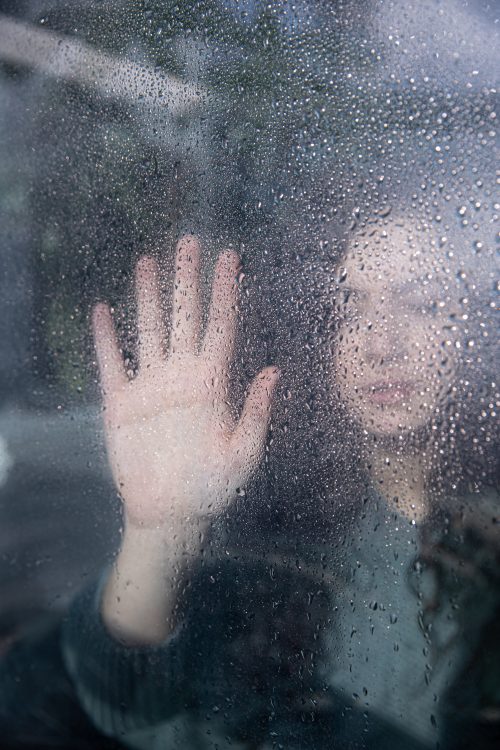
The windows and shop windows, especially if fogged, make the images in the rain unique. Each shot, if successful, will seem out of time and space towards a surreal atmosphere.
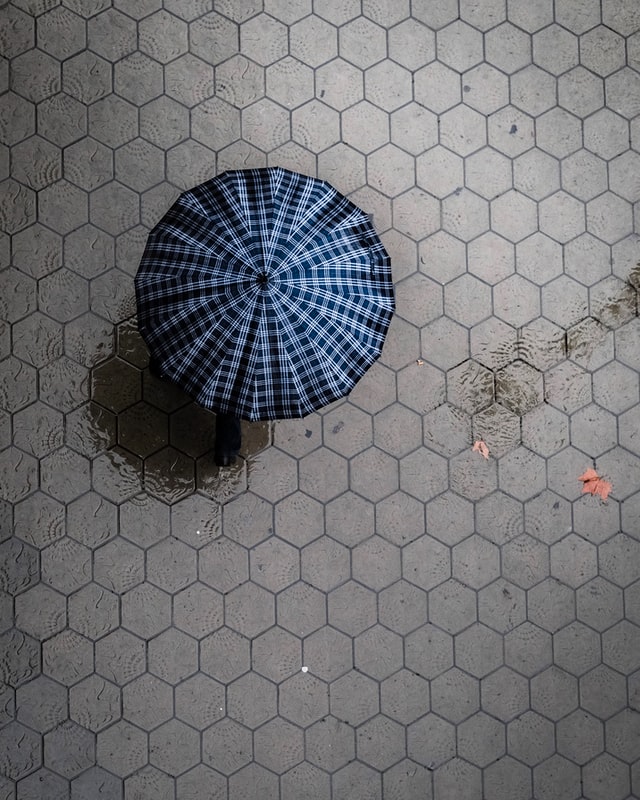 One way to show that it rains without catching the drops is to include umbrellas in your composition. Umbrellas can also add a splash of color to a gloomy, sad, and boring day due to rain.
Also, look for a point from above so the umbrellas in your composition will turn into great subjects.
All that remains is to talk about the infinite reflections, one of my fixed, especially in puddles. The ideal time to create these compositions is often immediately after precipitation when the roads are and raindrops do not disturb the reflection.
The blue hour can be magical and unrepeatable in the rain, especially in the city, where the asphalt is wet and poetically reflects the lights of street lamps and buildings. A perfect time is for a cinematic touch if you are also passionate about movies, or you are also a video maker.
Could people be missing? As people rush from one destination to another it’s the right time to test your skills as a street photographer as well or simply to train yourself in trying to freeze the moment or try different settings, breaking the “rules”.
That said, the next time it starts to rain, instead of getting sad, get ready and go out to shoot keeping yourself ready for all the inconveniences that only a rainy day can create. You will return home wet, but full of unique shots.
And remember, if your shots don’t live up to your idea, there will always be another rainy day.