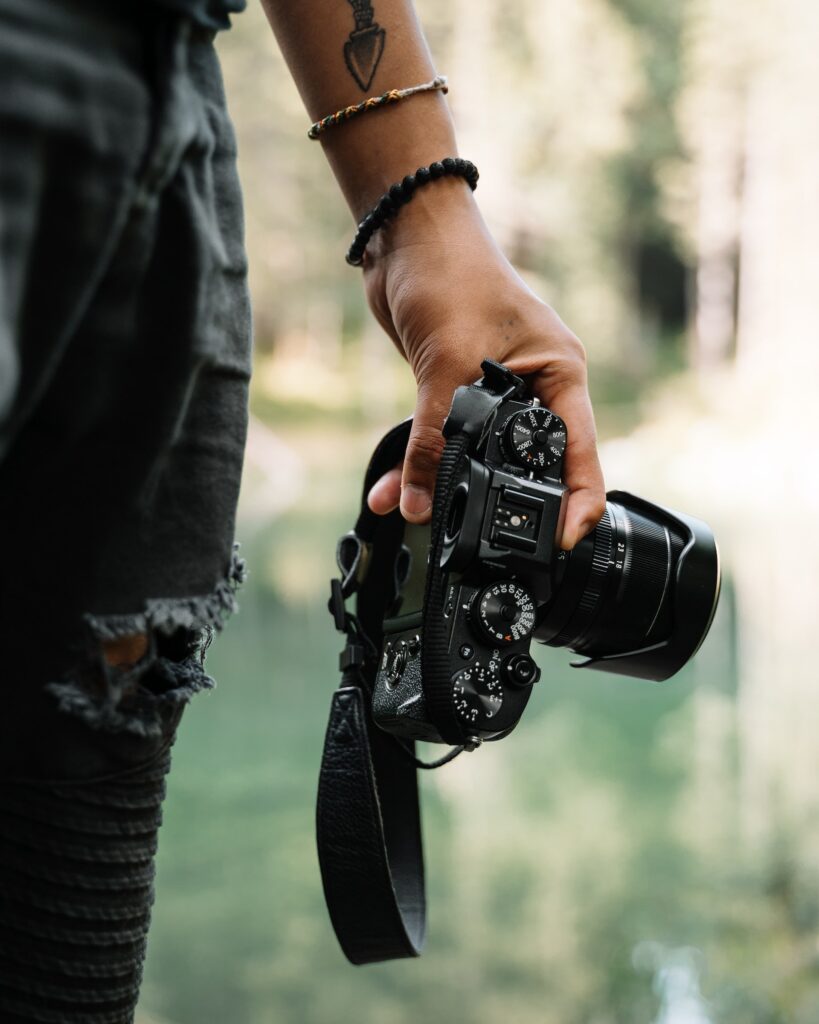
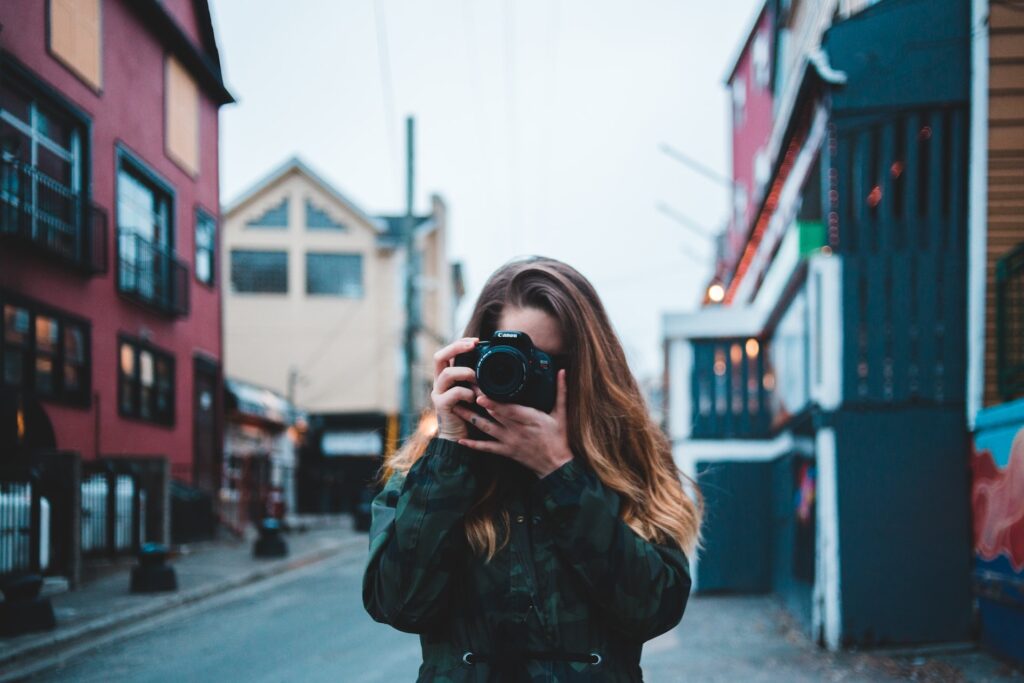
The secrets of street photography: Capturing wonderful moments on the go

The secrets of street photography: Capturing wonderful moments on the go Street photography is a unique and challenging art form that captures the candid moments and real-life experiences of people on the street. It requires a keen eye, a quick and decisive shooting style, and the ability to capture fleeting moments of beauty and emotion. Here are some tips and techniques for capturing stunning street photography on the go. First, it’s important to be discreet and unobtrusive. Street photography is all about capturing real and unplanned moments, and if your subjects are aware of your presence, they may act differently and the resulting photos may not be authentic. To avoid drawing attention to yourself, use a small and discreet camera, shoot from the hip or the chest, and avoid making direct eye contact with your subjects. Second, be prepared and ready to shoot at all times. Street photography is all about being in the right place at the right time, and you never know when a beautiful or interesting moment will present itself. So make sure your camera is charged and ready to go, and keep it with you at all times. Third, pay attention to the light. Light is an essential element of photography, and it can greatly affect the mood and atmosphere of your street photos. Look for interesting lighting situations, such as backlighting, sidelighting, or harsh contrast, and use them to create visually striking images. Fourth, look for interesting subjects and compositions. Street photography is all about capturing unique and unexpected moments of everyday life, so keep your eyes open and look for interesting subjects, scenes, and compositions. This could include interesting people, candid moments, or unusual perspectives. Fifth, experiment and try new things. Street photography is a constantly evolving and creative art form, so don’t be afraid to experiment and try new things. This could include shooting with different lenses, using different camera settings, or trying out new post-processing techniques. By experimenting, you can develop your own unique style and approach to street photography. In conclusion, the secrets of street photography are to be discreet, prepared, and creative. By mastering these techniques and staying open to the unexpected, you can capture stunning moments and real-life experiences on the go. Latest Articles: The secrets of street photography: Capturing wonderful moments on the go The art of storytelling in videomaking How to create a video marketing Strategy Why you should read "Rich Dad, Poor Dad" Pictory.ai: The Evolving Video Maker for Creatives
Five hobbies to improve your photography skills
Five hobbies to improve your photography skills We all know that having a hobby can improve work performance and reduce stress. People who spend time in creative leisure score higher on performance rankings and generate creative solutions to problems they can encounter, for example, at work. For professional photographers, the line between work and play can often blur, making hard to relax and recharge. So, I want to suggest to you five hobbies to try that can improve your photography skills: 1. Drawing Sketching can help you understand the basics of good composition. It doesn’t matter if you are able to draw or not. Henri Cartier Bresson also drew. “Photography is an immediate reaction, drawing is a meditation.” A lot of photographers prepare a sketch of their next photographic composition. 2. Cooking Many studies say that cooking boosts creativity and mindfulness. Plus, you feel more enthusiastic about what you have to do the next day. Cooking skills are especially beneficial for food photographers experimenting in the kitchen. 3. Hiking This hobby is related strongly whit landscape and adventure photography. Hiking gives you the possibility to enjoy the natural world without keeping your camera to your eye the whole time, forcing you to choose only the best moments to photograph. It also means you can discover and reach unique spots which others have missed and capture the beauty of nature and our planet. 4. Gardening Gardening can boost your mood and mindfulness. According to studies, all types of gardening proved beneficial. Also, you can improve your photography like Imogen Cunningham, who honed her skills as a photographer at home by shooting the plants she cultivated in her garden. 5. Road-tripping Road trips offer countless opportunities for surprises and encounter with unexpected sights and interesting strangers. You need only your bike (or car) and your camera. At any time you can start a wonderful journey. Conclusion There would be many other hobbies to suggest, but I’ll stop here. My intent is to show you how some passions can help you improve your photography. What hobby do you like to do? What passion can you also relate to photography? Think about it and let me know. Latest Articles: From amateur to pro: A step-by-step guide to improving your photography skills Capturing the beauty and power of thunderstorms: Tips and techniques for shooting lightning Discover the Power of Notion: An overview of the Productivity Platform 10 tips for shooting better videos How to Photograph Christmas Lights
From amateur to pro: A step-by-step guide to improving your photography skills
From amateur to pro: A step-by-step guide to improving your photography skills Are you an amateur photographer looking to take your skills to the next level? With dedication and practice, you can turn your passion for photography into professional-quality images. Here are some steps to help you improve your photography skills and become a pro. First, it’s important to understand the technical aspects of photography. This includes understanding the exposure triangle of aperture, shutter speed, and ISO, as well as the functions of your camera and lens. By mastering these technical elements, you can take control of your camera and create images with the right exposure, focus, and sharpness. Next, focus on composition. Composition is the arrangement of elements within your frame, and it’s what gives your photos balance, interest, and visual impact. Some basic composition techniques include the rule of thirds, leading lines, and symmetry. Practice using these techniques to compose your shots and create aesthetically pleasing images. Another key to improving your photography skills is to experiment with different styles and techniques. This can include shooting in black and white, using long exposures to capture movement, or trying out creative post-processing effects. By experimenting and trying new things, you can develop your own unique style and approach to photography. Additionally, seek out opportunities to learn from more experienced photographers. This can include attending workshops, joining a photography club, or working with a mentor. By learning from others, you can gain valuable insights, tips, and advice that can help you improve your skills. To become a pro, it’s also important to build a strong portfolio of your work. This will showcase your skills and style to potential clients and allow you to market yourself as a professional photographer. Consider creating a website or online portfolio to showcase your best images, and regularly update it with new work. In conclusion, improving your photography skills takes time, practice, and dedication. By mastering the technical aspects of photography, focusing on composition, experimenting with different styles and techniques, learning from others, and building a strong portfolio, you can turn your passion for photography into professional-quality images. Latest Articles: Discover the Power of Notion: An overview of the Productivity Platform 10 tips for shooting better videos How to Photograph Christmas Lights How to Develop a Growth Mindset in 5 steps 5 common videomaking mistakes to avoid
Capturing the beauty and power of thunderstorms: Tips and techniques for shooting lightning

Capturing the beauty and power of thunderstorms: Tips and techniques for shooting lightning Thunderstorms are a dramatic and powerful natural phenomenon, and capturing their beauty and power in a photograph can be a thrilling and rewarding experience. However, shooting lightning and thunderstorms can also be challenging and dangerous, so it’s important to follow some basic safety guidelines and know the right techniques. First, always check the weather forecast before heading out to shoot a thunderstorm. This will give you an idea of the storm’s location, direction, and intensity, and it will also help you plan your route and find a safe and suitable shooting location. Second, be prepared and ready to shoot. Make sure your camera and lenses are clean and in good working order, and have extra batteries and memory cards on hand. If you’re shooting with a DSLR or Mirrorless camera, use a fast lens with a wide aperture (f/2.8 or faster) to capture as much light as possible. If you’re shooting with a smartphone, use the camera’s “night mode” or a third-party app to improve low-light performance. Third, use a tripod and a remote shutter release. Shooting lightning and thunderstorms requires a long exposure, typically 1/4 to 1/2 second, to capture the lightning bolt. To avoid camera shake and blurry photos, use a tripod to stabilize your camera, and a remote shutter release or self-timer to trigger the shutter without touching the camera. Fourth, set your camera to manual mode. In manual mode, you have full control over the camera’s exposure settings. Fifth, use a fast shutter speed to freeze the action. While a long exposure is needed to capture the lightning bolt, you also want to freeze the motion of the storm clouds and other elements in the scene. To do this, set your shutter speed to a fast value, such as 1/125 or 1/250 second. This will allow you to capture sharp, detailed images of the storm’s features and movement. Sixth, experiment with different compositions and perspectives. Thunderstorms are visually striking, with dramatic clouds, lightning, and rain, so try to capture these elements in your photos. Experiment with different compositions, such as wide angles to show the scale of the storm, or close-ups to highlight the details and textures of the clouds and lightning. Finally, stay safe. Shooting thunderstorms can be dangerous, as lightning is unpredictable and can strike anywhere at any time. To avoid being struck, stay at least 6 feet away from metal objects, such as fences or poles, and avoid standing on high ground or in open fields. If you hear thunder, seek shelter immediately and wait for the storm to pass. In conclusion, shooting thunderstorms is a challenging but rewarding experience. By following these tips and techniques, you can capture the beauty and power of these dramatic natural events and create stunning and unique photos. Latest Articles: Discover the Power of Notion: An overview of the Productivity Platform 10 tips for shooting better videos How to Photograph Christmas Lights How to Develop a Growth Mindset in 5 steps 5 common videomaking mistakes to avoid
How to Photograph Christmas Lights

How to photograph Christmas Lights Photographing or filming Christmas lights can be a fun and rewarding activity, but it can also be challenging if you’re not familiar with the best techniques and settings to use. In this article, I’ll go over some tips and tricks for capturing stunning photos and videos of Christmas lights that will stand out and impress your friends, family, or anybody else. Scout out the Location First and foremost, it’s important to plan ahead and scout out your location. Look for areas with a lot of colorful lights, such as a neighborhood with houses decorated for the holidays or a local park or downtown area. Consider the time of day and the weather, as well. Evening and nighttime are generally the best times to photograph Christmas lights, as the darkness creates a more dramatic contrast against the bright lights. However, if it’s raining or foggy, this can add an interesting and atmospheric effect to your photos. Equipment and Camera Settings Once you’ve found your location, it’s time to set up your camera. If you’re using a DSLR or mirrorless camera, use a tripod to keep your camera steady and avoid blurry photos. You’ll also want to use a low ISO setting to reduce noise and a small aperture (high f-stop number) to keep the entire scene in focus. Depending on the lighting conditions, you may need to use a slower shutter speed to allow more light into the camera. If you’re using a smartphone, try using a tripod or a stable surface to rest it on, and consider using a third-party camera app that gives you more control over the camera settings. The Adobe Lightroom app is extremely powerful! Composition is essential When composing your shots, try to include some context in the frame, such as a tree or a building. This will give your photos a sense of place and help them feel more festive. You can also experiment with different angles and perspectives, such as shooting from above or below the lights. If you want to learn more about composition read this article. The key elements of Christmas light photos & videos One of the key elements to successful Christmas light photography is getting the white balance right. White balance refers to the way your camera interprets the colors in a scene, and it’s important to get it right in order to avoid your photos looking too warm or too cool. If you’re using a DSLR or mirrorless camera, you can manually set the white balance using the Kelvin scale. For smartphone cameras, you can try using a white balance preset, such as “tungsten” or “fluorescent,” or use the auto white balance setting and adjust it in post-processing if needed. Finally, don’t be afraid to play around with your camera’s settings and experiment with different techniques. Try using different lenses, such as a wide-angle lens to capture a larger area of light or a telephoto lens to zoom in on specific details. You can also try using creative techniques such as panning or long exposures to capture movement and add a sense of dynamism to your photos. By following these tips and tricks, you’ll be well on your way to capturing beautiful and memorable photos of Christmas lights. Happy holiday shooting! Latest Articles: Come sviluppare un Mindset di Crescita in 5 passaggi 5 errori comuni nel videomaking da evitare DaVinci Resolve vs. Adobe Premiere Pro: Perchè DVR è l'evidente vincitore Composizione fotografica: gli elementi fondamentali per una foto di successo Top 3 fotocamere per fotografi principianti da comprare nel 2023 Il ruolo dell'Intelligenza Artificiale nell'industria dei videogiochi Il potere dei videogiochi: come possono migliorare la creatività e il problem solving L'arte della fotografia di ritratto: tecniche di posa e illuminazione Come ChatGPT sta rivoluzionando l'elaborazione del linguaggio naturale Padroneggiare le basi della Fotografia: Una guida per principianti
Composition 101: The essential elements of a great photo

Composition 101: The essential elements of a great Photo Composition is the art of arranging the elements within a photograph to create a visually pleasing and balanced image. It’s what gives a photo its structure, interest, and visual impact, and it’s an essential skill for every photographer to master. Here are the essential elements of a great photo composition that you have to learn and incorporate into your next photos: The rule of thirds The rule of thirds is a fundamental composition technique that involves dividing your frame into three horizontal and vertical sections. The idea is to position the important elements of your photo along these lines, or at the intersections of these lines. This creates a more balanced and aesthetically pleasing composition. Leading lines Leading lines are visual elements that draw the viewer’s eye into the photo and guide their gaze around the frame. These could be natural lines, such as roads, rivers, or fences, or man-made lines, such as staircases, buildings, or bridges. By using leading lines, you can create depth, movement, and direction in your photos. Symmetry and patterns Symmetry and patterns are another effective way to create visual interest and balance in your photos. Symmetry involves arranging elements in your frame in a balanced and mirrored way, while patterns involve repeating elements, such as shapes, colors, or textures. By using symmetry and patterns, you can create a harmonious and organized composition. Negative space Negative space is the empty space around and between the elements in your frame. It’s an often-underappreciated element of the composition, but it’s essential for creating balance and visual harmony in your photos. By using negative space, you can give your subject room to breathe and create a sense of openness and calm. Framing your scene Framing is the use of natural or man-made elements to frame your subject and create a visual border around it. This could be a tree branch, an archway, or a window, for example. By using framing, you can create a sense of depth and perspective, and draw the viewer’s eye to your subject. In conclusion, the essential elements of a great photo composition are the rule of thirds, leading lines, symmetry and patterns, negative space, and framing. By mastering these techniques and applying them creatively, you can create stunning and balanced photos that capture the world around you in a unique and artistic way. Latest Articles: The Role of Artificial Intelligence in the Gaming Industry Top 3 Cameras for Beginner Photographers to buy in 2023. The Power of Video Games: How They Can Enhance Creativity and Problem-Solving Skills The art of Portrait photography: Posing and lighting techniques How ChatGPT is Revolutionizing Natural Language Processing
Top 3 Cameras for Beginner Photographers to buy in 2023.
Top 3 Cameras for Beginner Photographers to buy in 2023 Are you just starting out in photography and looking for a camera that will help you take great photos without breaking the bank? Look no further! In this article, I will provide an overview of some of the best cameras for beginners to buy this year. Canon EOS Rebel T6i This camera offers a 24.2 megapixel CMOS sensor, which will provide you with high-quality images. It also has built-in Wi-Fi and NFC connectivity, allowing you to easily share your photos with friends and family. Additionally, the T6i has a variety of shooting modes and Scene Intelligent Auto mode, which automatically adjusts the camera settings for you. Reach the Product on: Amazon USA Amazon UK Amazon IT / Europe Nikon D3500 This camera has a 24.2 megapixel CMOS sensor and a built-in guide mode, which provides step-by-step instructions on how to take better photos. It also has a long battery life, allowing you to take up to 1,550 shots on a single charge. Additionally, the D3500 is lightweight and compact, making it easy to carry with you wherever you go. Reach the Product on: Amazon USA Amazon UK Amazon IT / Europe Sony Alpha a6000 If you’re looking for a more advanced camera that will still be user-friendly for beginners, the Sony Alpha a6000 may be a good choice. This camera has a 24.3 megapixel CMOS sensor and can shoot at 11 frames per second, making it perfect for capturing fast-moving subjects. It also has built-in Wi-Fi and NFC connectivity, as well as a 180-degree tilting LCD screen, making it easy to take selfies or group photos. Reach the Product on: Amazon USA Amazon UK Amazon IT / Europe But remember: No matter which camera you choose, the most important thing is not the equipment, but the person behind the lens. With practice and experimentation, you can take great photos with any of these cameras. Happy shooting! Latest Articles: Top 3 Cameras for Beginner Photographers to buy in 2023. The Power of Video Games: How They Can Enhance Creativity and Problem-Solving Skills The art of Portrait photography: Posing and lighting techniques How ChatGPT is Revolutionizing Natural Language Processing Mastering the basics: A beginner's guide to photography
The art of Portrait photography: Posing and lighting techniques
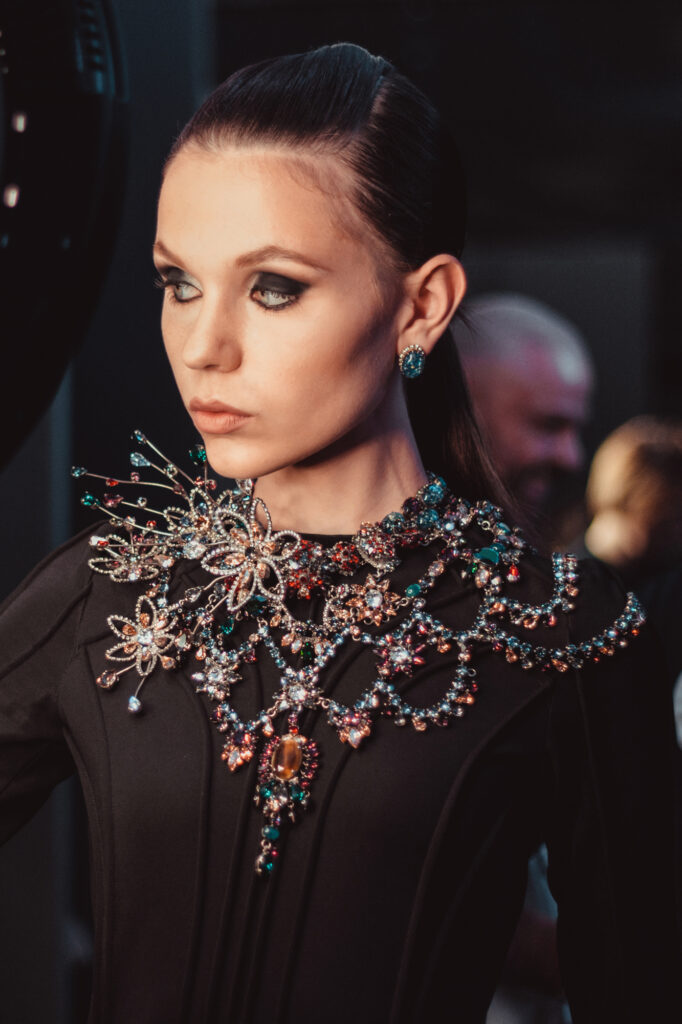
The art of portrait photography: Posing and lighting techniques Portrait photography is a beautiful and challenging art form that captures the unique character and personality of a person in a single image. To create stunning portrait photos, it’s important to understand the techniques of posing and lighting. First and foremost, good posing is essential for creating a flattering and natural-looking portrait. This involves positioning the subject’s body and limbs in a way that is comfortable and flattering, while also expressing their character and personality. Some basic posing techniques include using the rule of thirds, directing the subject’s gaze, and using hand and body gestures to add interest and emotion to the shot. Lighting is also a crucial element of portrait photography. Natural light is often the most flattering and beautiful, so try to take advantage of it when possible. If you’re shooting indoors or in low light, you may need to use artificial light sources, such as flash or continuous lighting. Experiment with different lighting setups to find the one that works best for your subject and your style. Another tip for creating stunning portrait photos is to connect with your subject. This involves getting to know the person you’re photographing, building a rapport with them, and making them feel comfortable and relaxed in front of the camera. This can help you capture their true character and personality in your photos. In conclusion, the art of portrait photography involves a combination of technical skills, artistic vision, and emotional connection. By mastering the techniques of posing and lighting, and connecting with your subject, you can create stunning portrait photos that capture the unique character and personality of the people you photograph. Check my Portraiture projects on my Homepage! Latest Articles: How ChatGPT is Revolutionizing Natural Language Processing Mastering the basics: A beginner’s guide to photography 10 ways to boost your productivity and achieve your Goals Talk with an AI. How to use ChatGPT MidJourney: crea arte scrivendo ad un’IA
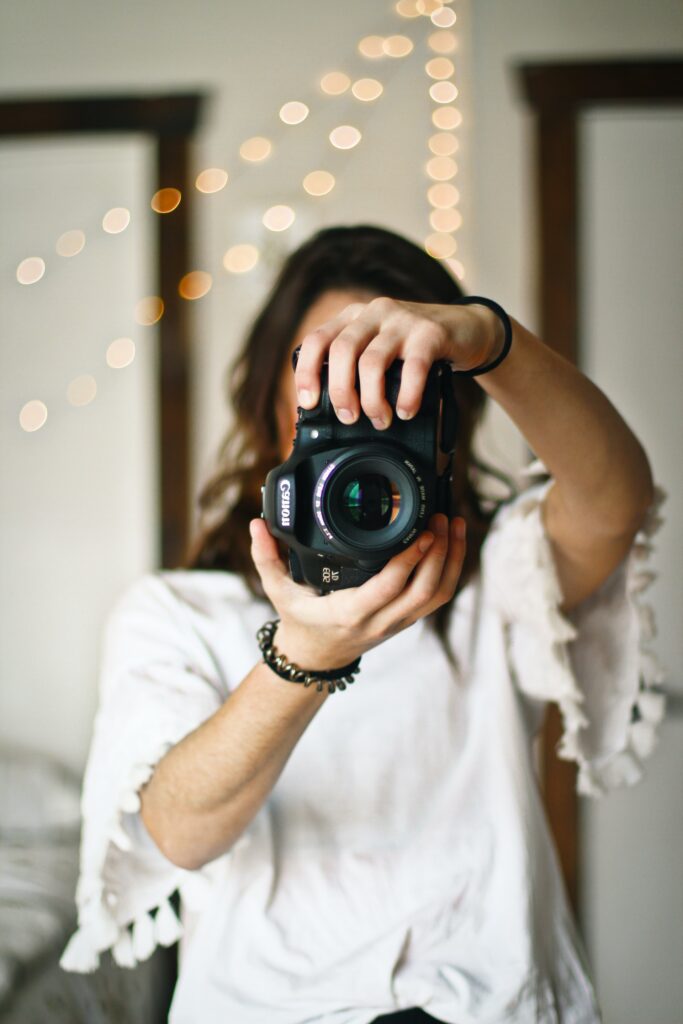
Mastering the basics: A beginner’s guide to photography
Mastering the basics:A beginner’s guide to Photography Photography is a fascinating and rewarding hobby (or job) that allows you to capture the world around you in a unique and artistic way. Whether you’re an absolute beginner or an experienced photographer looking to improve your skills, mastering the basics is essential for taking stunning photos. First and foremost, it’s important to understand the three essential elements of photography: aperture, shutter speed, and ISO: Aperture refers to the size of the opening in your camera lens, which determines how much light is let in. Shutter speed refers to the amount of time the shutter is open, which affects the amount of motion blur in your photo. ISO refers to the sensitivity of your camera’s sensor to light, which affects the overall exposure of your image. To take control of these elements and achieve the perfect exposure, it’s essential to shoot in manual mode. This allows you to adjust each setting individually to suit the lighting conditions and the look you’re trying to achieve. Start by setting a low ISO to reduce noise in your photos, and experiment with different aperture and shutter speed combinations to find the right balance of light and motion. Composition is another crucial aspect of photography. This refers to the arrangement of elements within your frame, and it’s what gives your photos balance, interest, and visual impact. Some basic composition techniques include the rule of thirds, leading lines, and symmetry. To apply these techniques, use your camera’s viewfinder or LCD screen to compose your shot, and adjust the position of your camera or the elements within your frame to achieve the desired effect. Lighting is also an important factor in photography. Natural light is often the most flattering and beautiful, so try to take advantage of it when possible. If you’re shooting indoors or in low light, you may need to use artificial light sources, such as flash or continuous lighting. Experiment with different lighting setups to find the one that works best for your subject and your style. Another key to taking stunning photos is to experiment and be creative. Try different angles, perspectives, and focal lengths to add variety to your shots. Use editing software to enhance your photos and give them a unique look. And don’t be afraid to try new techniques, such as long exposures or double exposures, to add a creative touch to your photos. Discover 5 hobbies to improve your photography skills. In conclusion, mastering the basics of photography takes time, practice, and experimentation. By understanding the essential elements of photography, practicing good composition, and experimenting with lighting and creative techniques, you can take stunning photos that capture the world around you in a unique and artistic way. Latest Articles: Mastering the basics: A beginner's guide to photography 10 ways to boost your productivity and achieve your Goals Talk with an AI. How to use ChatGPT MidJourney: crea arte scrivendo ad un'IA MidJourney: create art texting to an AI.
Color Spaces in Photography

Color Spaces in Photography Understandig Color Spaces is important in photography. The most well-known color spaces are sRGB, Adobe RGB, and ProPhoto RGB. In this post I want to introduce you to ‘color spaces’ and when to use them. 1. Color Space “Color space” just means a set of colors, a section of colors. sRGB, Adobe RGB, and ProPhoto RGB are three of the most commonly used in photography and RGB stands for Red, Green, and Blue. As a photographer you had already seen this illustration before: The diagram represents every color our eyes can see. So, sRGB, Adobe RGB, and ProPhoto RGB fit into this diagram. How? See the following diagram with the color spaces: Let’s analyze them: sRGB is the smallest color space. The range (or gamut) only covers apart, a ‘space’, of this color diagram. Adobe RGB gamut is larger. ProPhoto RGB is the largest and it includes “colors” outside what our eyes can see (imagination colors). It includes also sRGB and Adobe RGB. But keep in mind that these coordinates are specific to each color space. The same values won’t result in the same color in both sRGB and Adobe RGB, for example. 2. Bit Depth The Bit depths are simply how many bits of data are used to create each pixel. The baseline in photography is usually 8 bits per pixel, meaning that each individual pixel can represent 256 colors. So in your camera, there are 256 shades of red, 256 shades of green, and 256 shades of blue. The total is 256 x 256 x 256, or a whopping 16,777,216 RGB values. When we talk about a 16 bit per channel, it means that are 281 trillion RGB values. It is important to work and use 16-bit color while you’re editing a photo because it makes gradients in an image as smooth as possible. As we see in the diagrams, ProPhoto has “more colors” than others so we can think that using ProPhoto color space gives us more colors. It’s wrong! ProPhoto RGB may be “bigger” in terms of range, but an image in ProPhoto RGB color space doesn’t have more colors than a photo in sRGB. The important parameter is the bit depth. An 8-bit photo is limited to about 16.8 million RGB values, no matter what color space it’s in. A larger color space means you work with higher bit depth photos. Hight bit depth prevents banding in photos and gradients result in more uniform and smooth than a lower bit depth. For example in sRGB color space using 8-bit per channel color will often result in smooth gradients that are good, with no perceptible banding. 3. Working Space & Output Space There are two stages along the photo pipeline where you need to choose a color space: post-processing and outputting your image. When you post-process a photo, in general, it is ideal that your working space is ProPhoto RGB when you edit a RAW photo. RAW photos often contain colors outside of both sRGB and Adobe RGB color spaces, especially in high-saturation shadow regions. If your photo’s working space is sRGB, you’ll clip any colors that fall outside the sRGB range. Lightroom doesn’t even let you specify sRGB as your working space for this reason. Photoshop’s ideal settings are a bit tricky, but if you’re unsure, just set Edit > Color Settings > RGB > Preserve Embedded Profiles. That way, you preserve the color space of the photo. A lot of photographers use software like Adobe Camera RAW or Lightroom then open the image in Photoshop. But their export settings may create images in sRGB or Adobe RGB working space. To avoid it click on the blue link at the bottom of Camera RAW and change the images to ProPhoto, 16-bit. In Lightroom, go to Lightroom > External Editing > File Format TIFF, Color Space ProPhoto, Bit Depth 16. If you just realized that you’ve been using sRGB or AdobeRGB for Camera RAW’s or Lightroom’s external editing settings, and you’re rushing to change it to ProPhoto remember you now have an extra step to do when exporting images from Photoshop. For the web you have to convert them in sRGB. Click on Edit > Convert to Profile > sRGB. Remember that converting to sRGB for web images is essential. Let’s talk about Output space. It is the color space chosen for your final photo. The ideal color space depends on your output medium. For the web, sRGB is generally ideal. To send files for other photographers to edit, perhaps ProPhoto is preferable. When you edit an image in ProPhoto, you minimize the risk of clipping colors unnecessarily. If you have clients, they’ll open the images on some old photo viewing program without color management. This is why you have to export in sRGB. For printing, converting directly from a large working space (like ProPhoto) to the printer’s specific color space is ideal. Some (low-end) print labs won’t accept photos in any color space other than sRGB or perhaps Adobe RGB. In that case, send what they request, or switch to a different printing service lab. If you print your photos and have a wide-gamut monitor use Adobe RGB. It’s the best way to get your print to match the image on your screen. 4. How to print a photo If you’re not well-practiced at printing, the best thing to do is simple: Send your images off to a lab of your choice and pick their “color correction” option if they have one. For advanced printing needs, you’ll have to decide between printing at home or sending it off to a higher-end lab (one that lets you do the corrections yourself). If you’re sending it off to a lab, download their ICC profile for the ink/paper you’re using. Make your edits to exactly how the print will look. Export the image in a large color space (ProPhoto for example), then convert to the printer’s ICC profile. Send it off to the lab